Showing posts with label Cindy Gimbrone. Show all posts

Saturday, July 9, 2011

Studio Saturday with Cindy Gimbrone

Welcome to Studio Saturday! Each week one of our contributors gives you a sneak peek into their studio, creative process or inspirations. We ask a related question of our readers and hope you'll leave comments! As an incentive we offer a free prize each week to bribe you to use that keyboard. The following week we choose a random winner.
The winner this week is Pips! - Congratulations, you have won a copy of Chain and Bead Jewelry! . Email Lynn with your address, and she will send the book out to you.

Welcome to the studio of Cindy Gimbrone!

In the studio, I've usually got several projects going on at the same time. This week is no different. I have categories of projects, learning, reviewing, planning, and in-progress.

The learning project this week is working with 26 gauge wire and a crochet hook. I want to crochet wire and not just chains but crochet wire beads. Learning is about practice, practice, practice but we often we don't mention the frustration, frustration, frustration that comes along with learning a new skill so I work on until I get frustrated. Each time I'm a little better than the last but it's still a messy tangle of wire!

Frustration usually leads me to re-reading or reading and reviewing a new book. This week, it's Hot Connections Jewelry by Jennifer Chin. Reviewing books refreshes me and inspires me to return to my projects.

Since I'm reading a book on metal techniques, it's put me back in the mood to do one of my planning projects. I've had some bracelet blanks sitting on my work table for awhile. They've been staring at me for a couple of weeks. I was struck with inspiration yesterday and started to plan out a necklace. Which means this project has moved into the "in-progress" stage and that's where you've found me today in my Studio. Take a look over my shoulder:


I've planned my design, measured the metal blanks and lined up my stamps. So I've given you a feel for the workflow in my studio. Before I get back to work, I'd like to  hear from you:

What is your workflow like in your studio?  Do you start a project and finish it to the end or do you have a couple of projects laid out and move from one to another?

Leave me a comment and you'll be entered to win one of the stamped metal pendants I'm working on. I look forward to reading your comments!

Saturday, May 14, 2011

The Studio of Cindy Gimbrone: Friends and Allies

Welcome to Studio Saturday! Each week one of our contributors gives you a sneak peek into their studio, creative process or inspirations. We ask a related question of our readers and hope you'll leave comments! As an incentive we offer a free prize each week to bribe you to use that keyboard. The following week we choose a random winner.


The winner this week is Cynthia - Congratulations, you have won one of Lynn's lovely flower baskets. Email Lynn with your address, and she will send those out to you.

Welcome to the studio of Cindy Gimbrone!


If you read Studio Saturday regularly, you'll remember I had a big home office/jewelry studio clean out a month or so ago that got my creative wheels turning. I work in a couple of different mediums creating beads because each medium allows me to do something different.

One of the things I wanted to do but couldn't achieve very well in glass is using printed words.  I love the idea of walking around with jewelry that shows the world what you think and who you are in printed words. There are lots of talented bead/jewelry artists out there putting words on pendants and beads. But since we're all individuals, I didn't see any of the words or phrases that expressed how I felt. So that sent me to the bead table to create beads with my own phrases.

One word resonating with me lately is, ally. By impressing parts of the definition of ally, I hit at the heart of the meaning for me....


...an ally supports and loves you. An ally is a friend, a partner, a spouse, a family member, those who love and support you. Unconditionally. We all need someone like that in our lives, don't we?

I kept humming this classic song from the Beatles, "A Little Help from My Friends"  when I was making this new series of Word Beads...


Who is your friend and ally? Share with me and you'll be entered to win one of my new Ally Beads!

Saturday, March 19, 2011

Studio Saturday with Cindy Gimbrone - Feeling Refreshed!

Welcome to Studio Saturday! Each week one of our contributors gives you a sneak peek into their studio, creative process or inspirations. We ask a related question of our readers and hope you'll leave comments! As an incentive we offer a free prize each week to bribe you to use that keyboard. The following week we choose a random winner.

Last week's winner is My Life Under the Bus! Congratulations! You have won pewter reproduction button from Lynn. Send an email to Lynn and she will send it right out to you.

Welcome to the Studio of Cindy Gimbrone!


Well the flu finally caught up with us and I've spent the last month either taking care of someone with the flu or having it myself. But spring is slowly making her presence known in the Northeast so I've been spring cleaning in my office/studio.


Yup, those are bead and glass related books along with past issues of Bead and Button, Beadwork, catalogues from Vintaj, Rio Grande, Rings n Things, and just about anyone else who publishes a catalogue. 


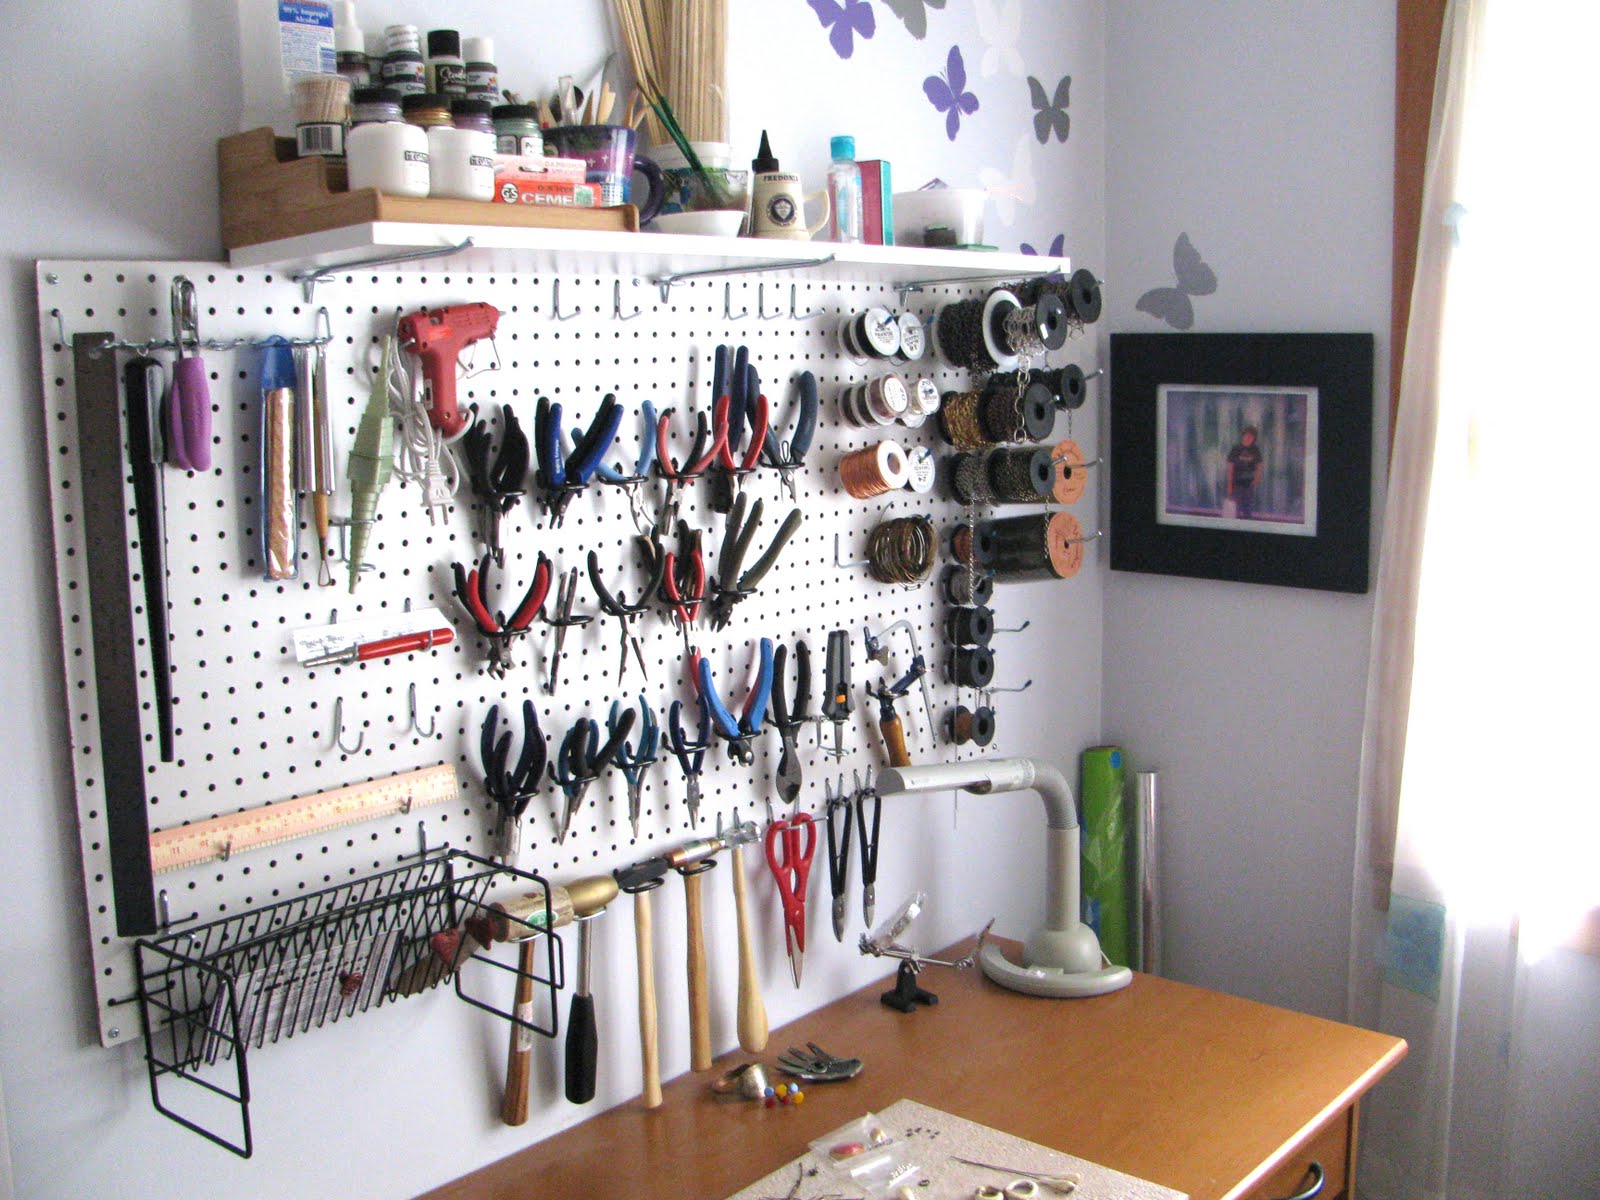
Next to my computer is my prep desk. I've just put up a pegboard for my tools. This is where I'll be putting together jewelry pieces.  I keep an antique faux wicker desk that was my maternal grandfathers next to the window.  When I was first married, it was the desk I used to work at, now it's much too small to use as my primary desk.

Now that my workspace is clear and the flu is gone,  I feel refreshed and ready to get back to creating!

Has spring come to your part of the world?  Have you done any spring cleaning?  What refreshes you?

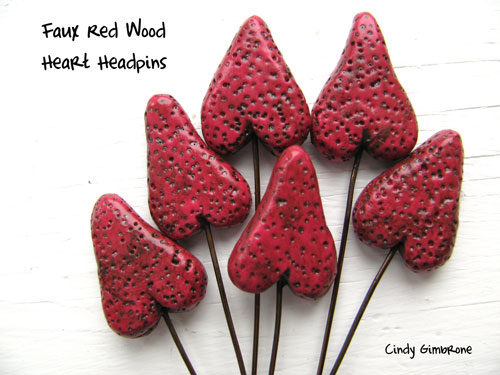
Leave a comment below and you'll be entered to win one (1) of my new Faux Wood Heart Headpins!

Saturday, January 22, 2011

Studio Saturday with Cindy Gimbrone: Sometimes there are no words...

Welcome to Studio Saturday! Each week one of our contributors gives you a sneak peek into their studio, creative process or inspirations. We ask a related question of our readers and hope you'll leave comments! As an incentive we offer a free prize each week to bribe you to use that keyboard. The following week we choose a random winner.


Last week's winner is EB Bead and Metal Works! Congratulations! You have won hand cast metal cross from Lynn. Send an email to Lynn and she will send it right out to you.


Welcome to the Studio of Cindy Gimbrone!


Readers of my blog know my word for this year is, "do." So instead of avoiding actually sitting down to make something by surfing the web or any other number of avoidance tactics, I'm making in a big way.

My work table is cluttered with various projects in different media. It feels good to get my hands into beads, chain, polymer clay, stamping, painting, sculpting and just do.

One of the reasons I create is to express something I don't have the words to express. Yet according to business advice, it's really important to name your handmade work to entice others to buy it.

How to name a piece you've made because you have no words to express what made you make it in the first place?

I made this necklace with great deliberation, I created the lotus pod, took a shell slice from the Sisterhood of the Traveling Beads and strung it together using Vintaj findings. The small beads inside the pod represent the lotus seeds deliberately saved and strung on the necklace. I love the look/feel of the necklace but I can't seem to come up with any words to explain or capture what I was feeling when I made it or what it represents to  me. I know it represents something but can't express it.

I need a copywriter!


How do you come up with names and titles for your creations?

Leave your thoughts below and you'll be entered to win one (1) Wired Red Lotus Pod.

I look forward to hearing from you!

Wednesday, December 22, 2010

On the 10th Day of Christmas: Bead Bravely Ornament


Difficulty:  Easy/Beginner

This is an easy, personalized, stamping project for the beginner. You'll stamp the spoon flat and measure where to place the letters of your chosen phrase. Then you'll create a loop in the spoon handle, decorate with glass double dip art beads by Cindy Gimbrone and finish off with a wire spiral ornament hanger.

Inspiration for the project

(Picture of Cindy's Grandmother at age 14)

Several years ago, my mother handed me a container full of odds and ends silverware owned by her mother. Since my grandmother had died when I was very young, I've always cherished the small things passed down to me that were hers.
My heirloom of mismatched tableware isn't particularly valuable. There isn't a full set of any pattern and it's inexpensive silverplate. So for years I carried around the silverware wondering what I'd really do with it. This is the perfect project. I have a memento from her yet don't feel like I'm ruining something of value. If you don't have a set of grandmother's mismatched silverware lying around, you can pick some up at garage sales and flea markets.

Materials:
vintage silverplate spoon
3 crimson double dips from Cindy Gimbrone Beads
3.5 inches of 18 gauge copper wire

Tools:
1/4 inch steel letter stamps
brass hammer
steel bench block
chainnose pliers
stepped jaw pliers
steel wool pad
cotton cloth
liver of sulfur
12 inch ruler
fine point marker
kiln or torch
metal tongs
large container for water
safety glasses

Step by Step Directions

1.  Softening/Annealing the silverplated spoons:

Hammering metal causes it to become brittle after awhile, if you don't have a torch to anneal the metal,  you can use a kiln.  I anneal the vintage silverplate spoons at 1000 - 1050 degrees F for about 20 min or until they look white - like in the picture below.


I take them out of the kiln with metal tongs and drop them immediately into water then they're able to be handled. 

2.  Using the brass hammer, hammer the bowl of the spoon flat:


3.  I annealed the spoon again after I pounded it flat, just to be sure it wouldn't get too brittle when I started to stamp.

4.  Measure the flattened bowl of the spoon, this will give you the "stampable" area for the phrase you choose. I chose, "Bead Bravely" to encourage one to follow one's own voice boldly.


I found the middle of the spoon and drew lines. You might be tempted to skip this step but believe me, it's important to measure especially if you're a beginner. Work from the center of the phrase out to the end. If you have a copy of Stamped Metal Jewelry by Lisa Niven Kelly, pages 36-37 have the best directions and tips for stamping and is where I learned to stamp for this project.

5.  Patina your spoon to highlight the stamped phrase/design. I used liver of sulfur from Cool Tools which has a video tutorial right on the website.  Liver of sulfur is available from many jewelry supply companies.  Immersing the spoon into the patina solution will darken the whole bowl of the spoon. Remove some of the patina by gently rubbing with a steel wool pad. Don't rub too long because the spoons are silverplate and you don't want to remove too much of the silver. Wipe with a clean cotton cloth.

6.  Create a loop in the handle using the chainnose pliers. It doesn't have to be a perfectly round loop, you just need a secure place to put the wire spiral ornament hanger.

7.  Wrap crimson double dips around the spoon handle.


8.  Make the wire spiral ornament hanger. Using the stepped pliers, make a loose spiral on each end of the 18 gauge wire.  Then, using your hands, make a large "S" out of the spiral wire with one end smaller than the other.  Attach the smaller end to the loop on the spoon.  Now your  Bead Bravely Ornament is ready to hang!


Enjoy your new heirloom ornament and Bead Bravely my friends!

Happy Holidays!

Saturday, October 16, 2010

Studio Saturday: Building Jewelry and A Free Project from Cindy Gimbrone

Welcome to Studio Saturday! Each week one of our contributors gives you a sneak peek into their studio, creative process or inspirations. We ask a related question of our readers and hope you'll leave comments! As an incentive we offer a free prize each week to bribe you to use that keyboard. The following week we choose a random winner.

Last week's winner is Dale! Congratulations! You have won reproduction button. Send an email to Lynn and she will send it right out to you.


Welcome to the Studio of Cindy Gimbrone!


Time is flying by, I can hardly believe it's October and into the full flush of the fall foliage. It hardly seems a year has come and gone almost since our family vacation to New York City for Thanksgiving. That's where I was struck by the architectural medallion hanging on the front of Radio City Music Hall like a necklace around the neck of a runway fashion model.  My mind started racing and I knew this had to be one of the inspiration pieces for the Art Bead Scene Challenge. I stood on the crowded sidewalk on that Thanksgiving Thursday snapping away trying to keep my excitement at bay.  For me, the inspiration was in the metal, the hand forming and enamel of the piece.


There is alot in the piece to be inspired by, technique, materials, style, color. To over use a Thanksgiving reference, it's a cornucopia of ideas!

Taking a cue from the materials, I ran home and created a necklace with metal clay.


I premiered Hiding Withing Myself on my blog with the intention to write a tutorial for ABS. It's a very easy beading/stringing project to make:

Supplies:

1 Stile Floreal: Sunflower Pendant
1 Vintaj 40mm donut
1 15mm Vintaj jump ring
7 Vintaj 4.75 jump ring
1 10mm Vintag jump ring
2 5mm x 9mm Swarovski pink crystal briolettes
2 4mm round periot beads
10 inches 22 gauge brass wire
1 12mm Vintaj lobster clasp
18 inches Vintaj 6.5mm x 9.5mm etched chain

Required tools:

Chainnose pliers (2)

Beading Skills Required:
Opening and closing jump rings.
Making eye pins.


Directions:

1. Attach the 12mm lobster clasp to the chain using the 4.75 jump ring.

2. Assemble the pendant. Attach the Stile Floreal Pendant to the 40mm donut with the 15mm jump ring. Close the 15mm jump ring.

3. Optional: Make an eyepin by creating a loop at one end of the 22 gauge wire. String on the periot bead. Make a loop at the top. Repeat with the second peridot bead. Open one of the 4.25 jump rings and string the pink briolette onto it. Close the jump ring. Repeat with the other briolette.

3. Find the middle of the necklace/chain. This is where your pendant will hang. Open the 10mm jump ring and string on the peridot, pink briolettes and the pendant. Attach the 10mm jump ring to the center of the necklace.

The Vintaj donut is a perfect frame for the Stile Floreal pendant - wear it and enjoy!


So today's question is, what project is on your design table today? Please leave a comment and you'll be entered to win two (2) feet of Vintaj 6.5mm by 9.5mm chain.

I look forward to reading your comments!

Saturday, August 28, 2010

Studio Saturday with Cindy Gimbrone

Welcome to Studio Saturday! Each week one of our contributors gives you a sneak peek into their studio, creative process or inspirations. We ask a related question of our readers and hope you'll leave comments! As an incentive we offer a free prize each week to bribe you to use that keyboard. The following week we choose a random winner.

Last week's winner is Cetta! Congratulations! You have won a toggle clasp from Lynn! Send an email to Lynn and she will get it right out to you.


Welcome to the Studio of Cindy Gimbrone!

I've done something a little different this week. Instead of still photography, I've created my first Studio Saturday Vlog!


Looking forward to reading your comments!

Saturday, July 10, 2010

Reverse Gardening - Studio Saturday with Cindy Gimbrone

Welcome to Studio Saturday! Each week one of our contributors gives you a sneak peek into their studio, creative process or inspirations. We ask a related question of our readers and hope you'll leave comments! As an incentive we offer a free prize each week to bribe you to use that keyboard. The following week we choose a random winner.

Last week's winner is Lissc ! Congratulations! You have won a set of Lynn's openwork disks. Send an email to Lynn and she will get them right out to you.


Welcome to the Studio of Cindy Gimbrone!


Well, the seeds I planted last Winter are bearing fruit this summer. Yup, I've done some "reverse gardening" but not with plants, with the Double Dips, turning them into published easy jewelry projects. I planted two "seeds" at almost the same time.


I love to create simple, easy wire projects. My goal is to take the obvious and put a unique twist on it. I make the flamework glass Double Dip components and then set about designing a unique way to use them.

I submitted the project to Step by Step this past winter. I planted the seed. It's hard to keep a new project under wraps while it's germinating at the magazine. But like the plant that grows and blooms, it puts the published project has grown and bloomed. It's now happily nestled among the other projects like flowers in a garden. Ready for the readers to pick and enjoy.

Have you done any reverse gardening this past year? Did you plant the seeds earlier and now you're seeing your creation bloom?

Comment and share your story, I'd love to hear from you! When you do share, you'll be entered to win one of my Double Dips to use in your very own ring!

(Photo of the August issue of Step by Step Wire courtesy of Interweave's website.)

Tuesday, June 8, 2010

Free Wire Tutorial: Matchin' by Wrappin'

(This post was previously published on ABS Editor Cindy Gimbrone's blog, it appears here with her permission.)

I make all my Double Dips with copper wire. If you are creating a design in a different metal then how might you go about matching the metal?

In this week's Wednesday Wire, I will show you how with a simple wrapping technique. I'm partial to the deep brown color of the Vintaj brass. Since it's impossible for a manufacturer to create all of the findings I could want, I often need to match the metals in my jewelry designs.

When using the Double Dips, I need the exposed wire to match the Vintaj bronze color. I buy fine gauge wire from Parawire to wrap around the copper wire of the Double Dip. Simple enough but there's a bit of a trick to it.


Gather up your tools and supplies:

Begin by wrapping a couple of winds around the wire leaving a 4 inch tail of wire at the end toward the glass bulb of the Double Dip:

Push the few wraps down toward the glass bulb. Now, wind in the opposite direction towards the other end keeping the wire nice and tight next to each other. I use my fingers to hold the wire in place as I wind but you can use your chainnose pliers to hold the wire in place as you wind.

When you reach the end, you can create a small "beadcap" by winding down onto the glass.

Cut the small gauge wire with your flush cutters.

Now you're done! Go to the opposite end and create a beadcap by winding and cutting the wire in the same way as you just did above.

Now I've got a double dip that will match the Vintaj brass perfectly!

Saturday, May 22, 2010

Re-Discovery: Studio Saturday with Cindy Gimbrone

Welcome to Studio Saturday! Each week one of our contributors gives you a sneak peek into their studio, creative process or inspirations. We ask a related question of our readers and hope you'll leave comments! As an incentive we offer a free prize each week to bribe you to use that keyboard. The following week we choose a random winner.

Last week's winner is Theresa Buchle/Bead-Mused ! Congratulations! You have won a set of Lynn's pewter charms Send an email to Lynn and she will get them right out to you.

Welcome to the Studio of Cindy Gimbrone!


Step a little closer to my workbench. I've got alot to show you today! This week I blogged about picking up the pastels and drawing. I didn't have any real drawing tools and I wanted to sketch out a design using a set of the Turquoise glass links and double dips. I took my new pastel pencils and charcoal and got to work.

Take a virtual look over my shoulder and see how my design began and ended.


Voila! My completed necklace entitled, "Smokey Blues." I can't tell you how much I enjoyed drawing and coloring the design! The investment in my first set of drawing tools was worth every penny! So that leads me to today's question:

Have you re-discovered a skill, talent or simply something you used to enjoy? Share your story with me and you'll be entered to win a set of the transparent Turquoise Links and Double Dips.


I look forward to reading what YOU'VE rediscovered!